• Portfolio
    • Professional >
      • Social Construct >
        • SoCo Kitchen
        • SoCo Bathroom
        • SoCo Services Cupboard
      • Oliso >
        • Sous Vide >
          • Sous Vide Clamshell
          • Sous Vide Induction
          • Sous Vide Panini
        • Fermentation
        • Vacuum Sealer >
          • VacHeatSealSketches
        • Irons
        • Panini
        • Jar Sealer
      • produktworks
      • Upwork
      • DIY >
        • DIY Sign
        • Kits >
          • Automata
          • Backpack
          • Bike Light
          • Clock
          • Paper
          • Sewing
          • Solar
          • Wind
          • Zombie
    • Personal Work >
      • Fabric and Leather >
        • Sewn >
          • Pleat Fold V3
          • Pleat Fold V2
          • Pleat Fold V1
          • Black Clamshell with Detachable Shoulder Bag V3
          • Black Clamshell with Detachable Shoulder Bag V2
          • Black Carryon
          • Red Carryon
          • Rolltop Pannier
          • Clamshell Backpack
          • Black Travel Clamshell Expandable
          • Waxed Canvas Backpack
          • Colorful V1
          • Travel Backpack With Removable Lid
          • Sunbrella Daypack
          • Backpack Pannier
          • Black Small Daypack
          • Bike Handlebar Bag
          • Carry-on Rolltop Backpack
        • Leather
      • Sculpture >
        • Kinetic >
          • Flapping Bird Music Machine
          • Ratchet Crank
          • Balloon Popping
          • Hand Crank Butterfly
          • Mini Rube Goldberg Machine
          • Solar Powered Marble Machine
          • Oscillating DIY Logo
          • Pneumatic Box Opener
        • Static
  • About
  • Blog
  • Book
    • Chain Reaction Machines
  • Portfolio
    • Professional >
      • Social Construct >
        • SoCo Kitchen
        • SoCo Bathroom
        • SoCo Services Cupboard
      • Oliso >
        • Sous Vide >
          • Sous Vide Clamshell
          • Sous Vide Induction
          • Sous Vide Panini
        • Fermentation
        • Vacuum Sealer >
          • VacHeatSealSketches
        • Irons
        • Panini
        • Jar Sealer
      • produktworks
      • Upwork
      • DIY >
        • DIY Sign
        • Kits >
          • Automata
          • Backpack
          • Bike Light
          • Clock
          • Paper
          • Sewing
          • Solar
          • Wind
          • Zombie
    • Personal Work >
      • Fabric and Leather >
        • Sewn >
          • Pleat Fold V3
          • Pleat Fold V2
          • Pleat Fold V1
          • Black Clamshell with Detachable Shoulder Bag V3
          • Black Clamshell with Detachable Shoulder Bag V2
          • Black Carryon
          • Red Carryon
          • Rolltop Pannier
          • Clamshell Backpack
          • Black Travel Clamshell Expandable
          • Waxed Canvas Backpack
          • Colorful V1
          • Travel Backpack With Removable Lid
          • Sunbrella Daypack
          • Backpack Pannier
          • Black Small Daypack
          • Bike Handlebar Bag
          • Carry-on Rolltop Backpack
        • Leather
      • Sculpture >
        • Kinetic >
          • Flapping Bird Music Machine
          • Ratchet Crank
          • Balloon Popping
          • Hand Crank Butterfly
          • Mini Rube Goldberg Machine
          • Solar Powered Marble Machine
          • Oscillating DIY Logo
          • Pneumatic Box Opener
        • Static
  • About
  • Blog
  • Book
    • Chain Reaction Machines
Social Construct Kitchen
Picture
Overview
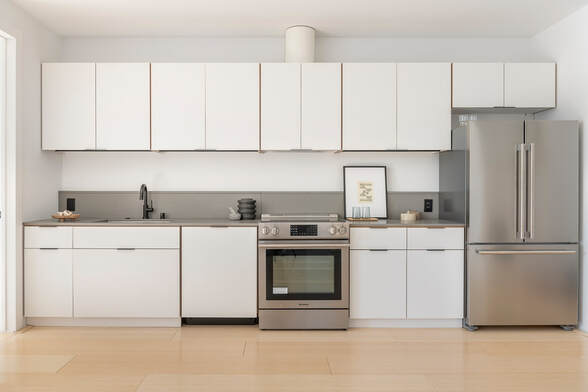
The aesthetic of the kitchen was defined by the architect in charge of Porject 1. My role was to figure out the best way for it to be manufactured and quickly and easily installed on site. The casework was mostly constructed in a traditional manner.

The backsplash was a bit different because it had to h
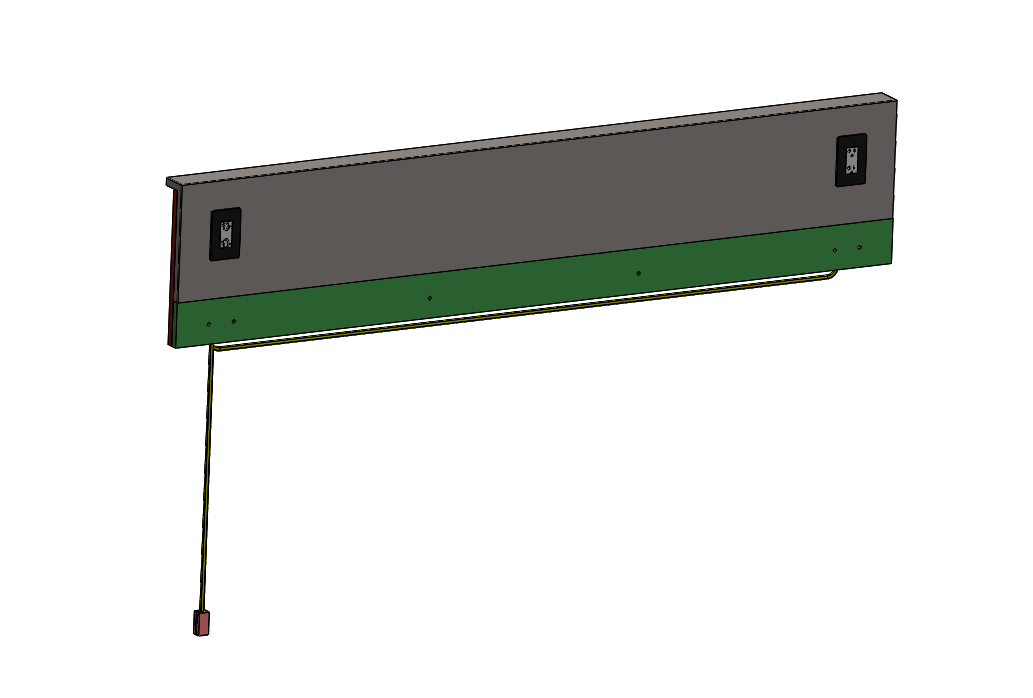
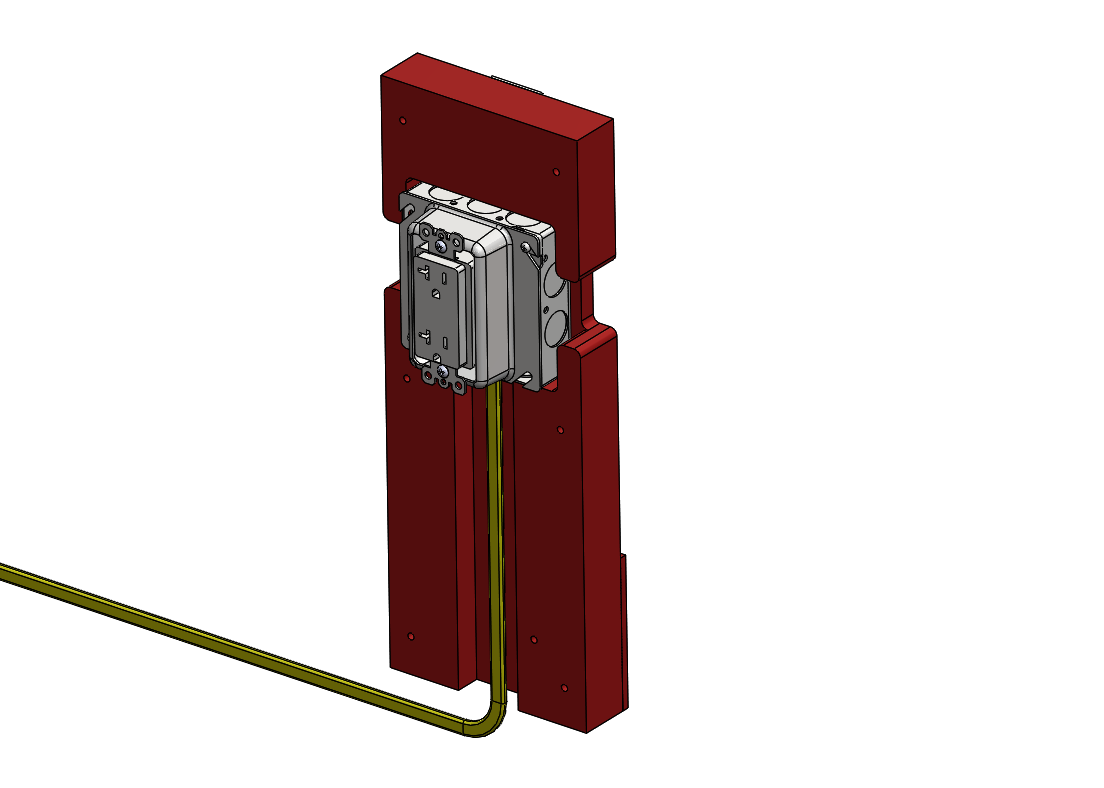
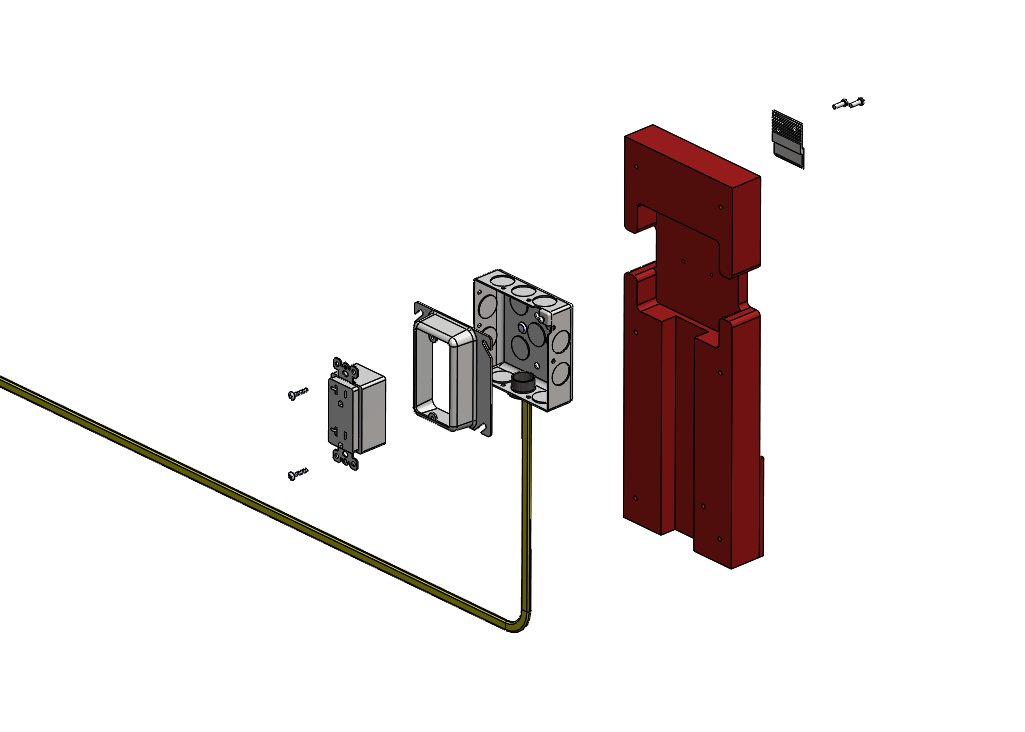
ouse the 120V outlets. Putting outlets in the backsplash should have been fairly easy and straightforward, but there were some challenges. Firstly, everything had to sit on top of the drywall. Unlike traditional construction, the outlets are not embedded in the walls. Since the backsplash was made of stone it couldn't be pocketed. These two constraints limited the design.

Constraints and Solutions
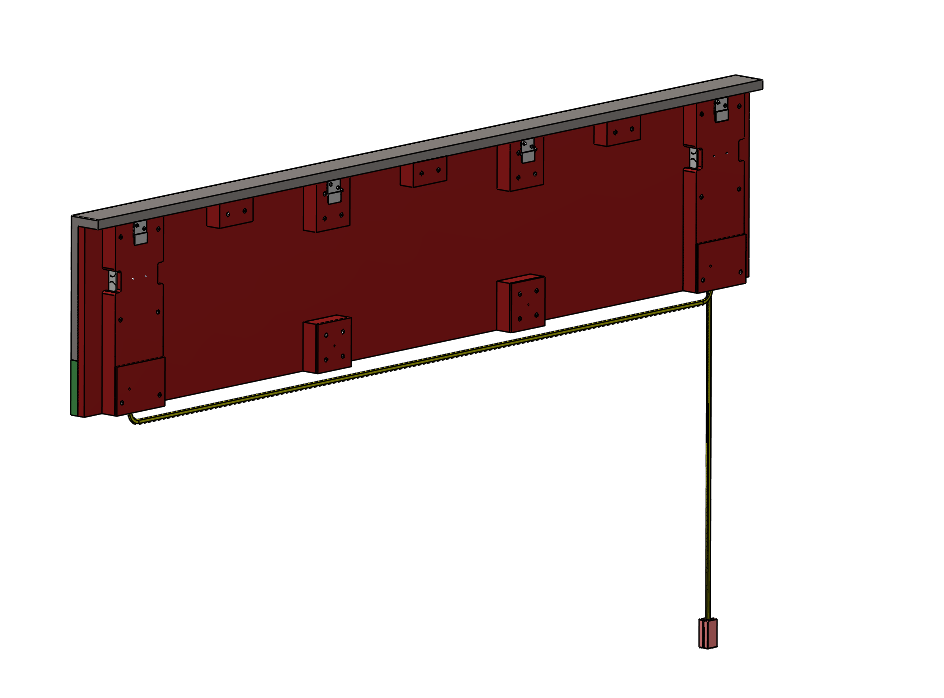
One, the junction box that houses the receptacle must be shallow. Since a certain volume of air space has to be met by code, you have to gain that volume in the width of the j-box, since the height is fixed and the depth is minimized. Two, a mudring (used in conjunction with a j-box to be able to mount a receptacle even with the wall surface) must be used in order to be able to mount the receptacle even with the stone surface. Three, the plug/j-box must be securely mounted so it doesn't come loose when plugging and unplugging an appliance. Adhesives aren't a good idea if you need to replace the outlet, since it makes it difficult to remove, and you can't screw into the stone. The stone is mounted to a piece of wood, but there were no mounting brackets on the junction box to mount it from the back side. Also, adding two brackets per outlet would have added to the labor costs.  A wooden piece was built to house the junction box as well as provide a hard, flat surface to press against the drywall. 
Picture
Picture
Picture
Picture
The backsplash attaches to the wall using extruded french cleats. A long rail is mounted to the wall, and shorter clips are mounted to the backsplash. The stone plus plywood backing and outlets make the pieces quite heavy (~70 lbs), so two people are required to install it. For the most part, this was a smooth process. Issues would arise if the wall had a bow, which was quite common. The wall might be 1/4" out over the length of the backsplash, which slowed down install since you had to make sure the cleats were engaging. Once hanging from the drywall, screws were attached in predrilled holes in a wooden board at the bottom of the backsplash in order to fully secure it to a wooden block in the wall. This part was covered up once the lower kitchen cabinets were installed. 

Each kitchen had two backsplash sections, and total install time per kitchen was less than 10 minutes once the parts were in hand. 
Lessons Learned
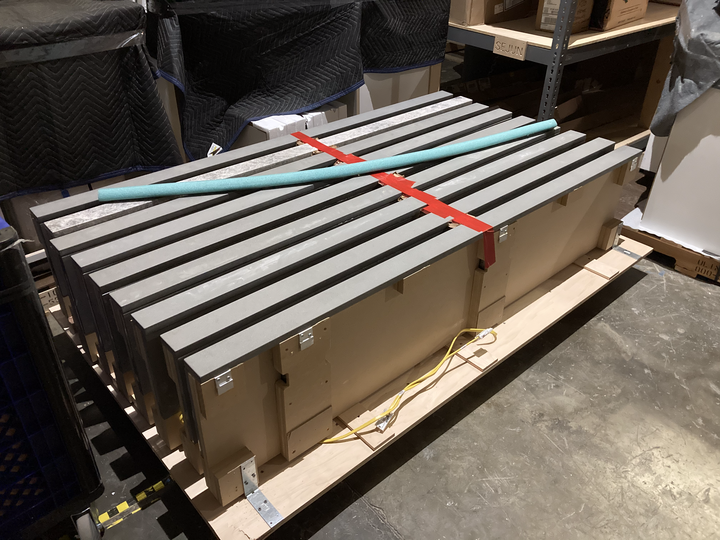
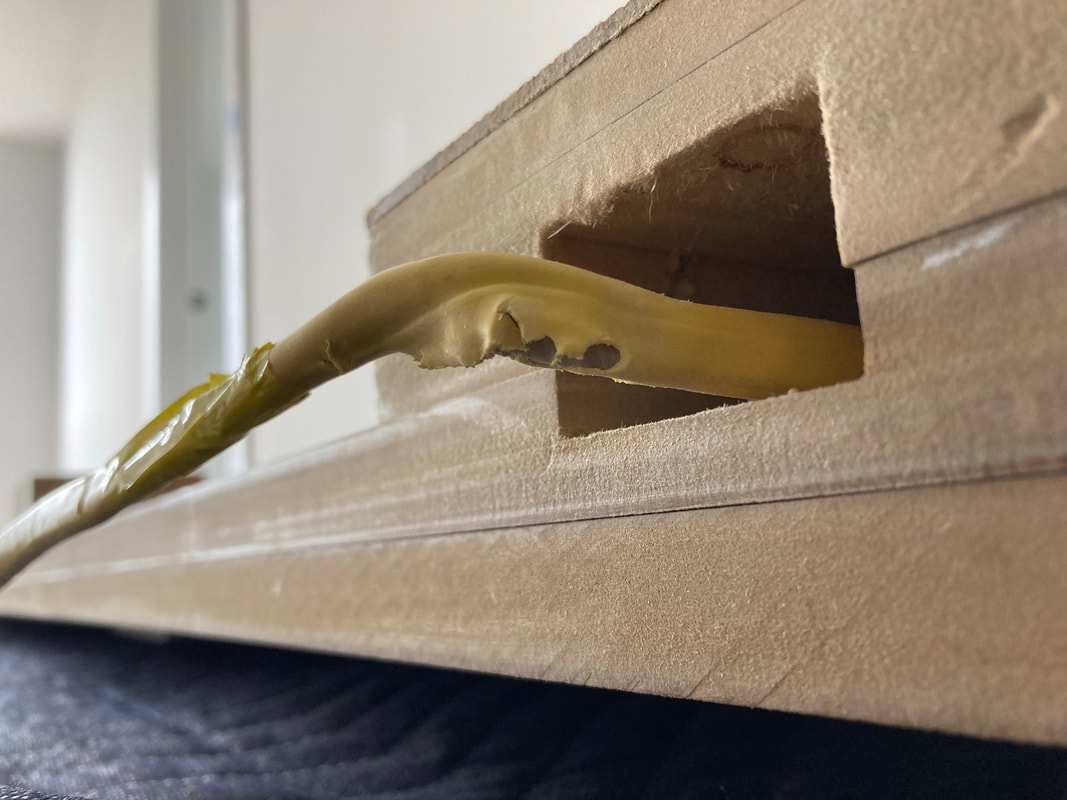
The biggest issue turned out to be in handling the backsplash units. Once on site, everything went fine, but there was a hiccup in logistics and the backsplashes, which were meant to ship all at once, had to be unpacked and shipped 2-4 at a time since there was a delay on site. This caused damage to the Romex/wire since they had to be loaded/unloaded and repeatedly moved from their pallet. In the future, if this deign didn't change, some sort of protective tape would need to be applied to the wire to keep it in the correct spot and out of harm's way. 
Picture
How they were supposed to ship
Picture
Damaged Romex due to unpacking/repacking multiple times. 

​