• Portfolio
    • Professional >
      • Canvas >
        • Gen 2 Sanding Head End Effector
        • Hose Management >
          • Gen 2 Hose Management
          • Gen 3 Hose Management
        • Mud Cart
        • Gen 3 Sanding Head End Effector
      • Social Construct >
        • SoCo Kitchen
        • SoCo Bathroom
        • SoCo Services Cupboard
      • Oliso >
        • Sous Vide >
          • Sous Vide Clamshell
          • Sous Vide Induction
          • Sous Vide Panini
        • Fermentation
        • Vacuum Sealer >
          • VacHeatSealSketches
        • Irons
        • Panini
        • Jar Sealer
      • produktworks
      • Upwork
      • DIY >
        • DIY Sign
        • Kits >
          • Automata
          • Backpack
          • Bike Light
          • Clock
          • Paper
          • Sewing
          • Solar
          • Wind
          • Zombie
    • Personal Work >
      • Fabric and Leather >
        • Sewn >
          • Pleat Fold V3
          • Pleat Fold V2
          • Pleat Fold V1
          • Black Clamshell with Detachable Shoulder Bag V3
          • Black Clamshell with Detachable Shoulder Bag V2
          • Black Carryon
          • Red Carryon
          • Rolltop Pannier
          • Clamshell Backpack
          • Black Travel Clamshell Expandable
          • Waxed Canvas Backpack
          • Colorful V1
          • Travel Backpack With Removable Lid
          • Sunbrella Daypack
          • Backpack Pannier
          • Black Small Daypack
          • Bike Handlebar Bag
          • Carry-on Rolltop Backpack
        • Leather
      • Sculpture >
        • Kinetic >
          • Flapping Bird Music Machine
          • Ratchet Crank
          • Balloon Popping
          • Hand Crank Butterfly
          • Mini Rube Goldberg Machine
          • Solar Powered Marble Machine
          • Oscillating DIY Logo
          • Pneumatic Box Opener
        • Static
  • About
  • Blog
  • Book
    • Chain Reaction Machines
  • Portfolio
    • Professional >
      • Canvas >
        • Gen 2 Sanding Head End Effector
        • Hose Management >
          • Gen 2 Hose Management
          • Gen 3 Hose Management
        • Mud Cart
        • Gen 3 Sanding Head End Effector
      • Social Construct >
        • SoCo Kitchen
        • SoCo Bathroom
        • SoCo Services Cupboard
      • Oliso >
        • Sous Vide >
          • Sous Vide Clamshell
          • Sous Vide Induction
          • Sous Vide Panini
        • Fermentation
        • Vacuum Sealer >
          • VacHeatSealSketches
        • Irons
        • Panini
        • Jar Sealer
      • produktworks
      • Upwork
      • DIY >
        • DIY Sign
        • Kits >
          • Automata
          • Backpack
          • Bike Light
          • Clock
          • Paper
          • Sewing
          • Solar
          • Wind
          • Zombie
    • Personal Work >
      • Fabric and Leather >
        • Sewn >
          • Pleat Fold V3
          • Pleat Fold V2
          • Pleat Fold V1
          • Black Clamshell with Detachable Shoulder Bag V3
          • Black Clamshell with Detachable Shoulder Bag V2
          • Black Carryon
          • Red Carryon
          • Rolltop Pannier
          • Clamshell Backpack
          • Black Travel Clamshell Expandable
          • Waxed Canvas Backpack
          • Colorful V1
          • Travel Backpack With Removable Lid
          • Sunbrella Daypack
          • Backpack Pannier
          • Black Small Daypack
          • Bike Handlebar Bag
          • Carry-on Rolltop Backpack
        • Leather
      • Sculpture >
        • Kinetic >
          • Flapping Bird Music Machine
          • Ratchet Crank
          • Balloon Popping
          • Hand Crank Butterfly
          • Mini Rube Goldberg Machine
          • Solar Powered Marble Machine
          • Oscillating DIY Logo
          • Pneumatic Box Opener
        • Static
  • About
  • Blog
  • Book
    • Chain Reaction Machines

​how we spend our days is, of course, how we spend our lives.

Sewing the nth version of the backpack pannier

10/3/2016

3 Comments

 
It's my experience that cyclists who carry things while biking fall into two categories. Those that wear a backpack and those that use a pannier. Most of us like using panniers but then want a backpack once we get to wherever we're going. The problem with most of the backpack panniers that are on the market is that they're not that great. Some are even awful. Trying carrying more than 5 pounds in your Ortlieb pannier with the additional backpack panel. It's insanely uncomfortable. Most other backpack panniers get it wrong in other ways. They attach the mounting hooks much too high in order to be able to put the shoulder straps below them. Obviously this makes it somewhat more comfortable when you're in backpack mode, but then you have this gangly pannier whose bottom covers up your quick release. And if you try and attach the hooks in a normal location, you end up shrinking the height of your backpack by quite a bit. It make it sit too high on your back, and it's not comfortable. Basically, all of the backpack panniers I've used are half-assed attempts to bridge the gap between the two. At best you get a good pannier and a pretty terrible backpack, or vice a versa.
Picture
Ortlieb pannier carry system. Good effort, but sits too high and s extremely uncomfortable.
Picture
This bag looks nice, bit it's a bit too long for me in  pannier mode, and it attaches to your rack via velcro. I can't imagine that keeping your bag steady when you're pounding the potholes of SF. 
Picture
Picture
This combo from North St. bags are so nice looking, and I'm assuming they're made extremely well, but you have the same issue. Hooks mounted super high, shoulder straps mounted below. Also, from my experience, those buckle snap on the bottom corners can find their way into your spokes if you're pumping up a hill and you have an crappy rack like mine. 
Another issue these past two bags have are that the surface that is exposed to your rack is what goes against your bike. If you hit a dirty puddle or have a dirty rack, that stuff transfers to your back. There are quite a few solutions out there that mitigate this a bit. 
Picture
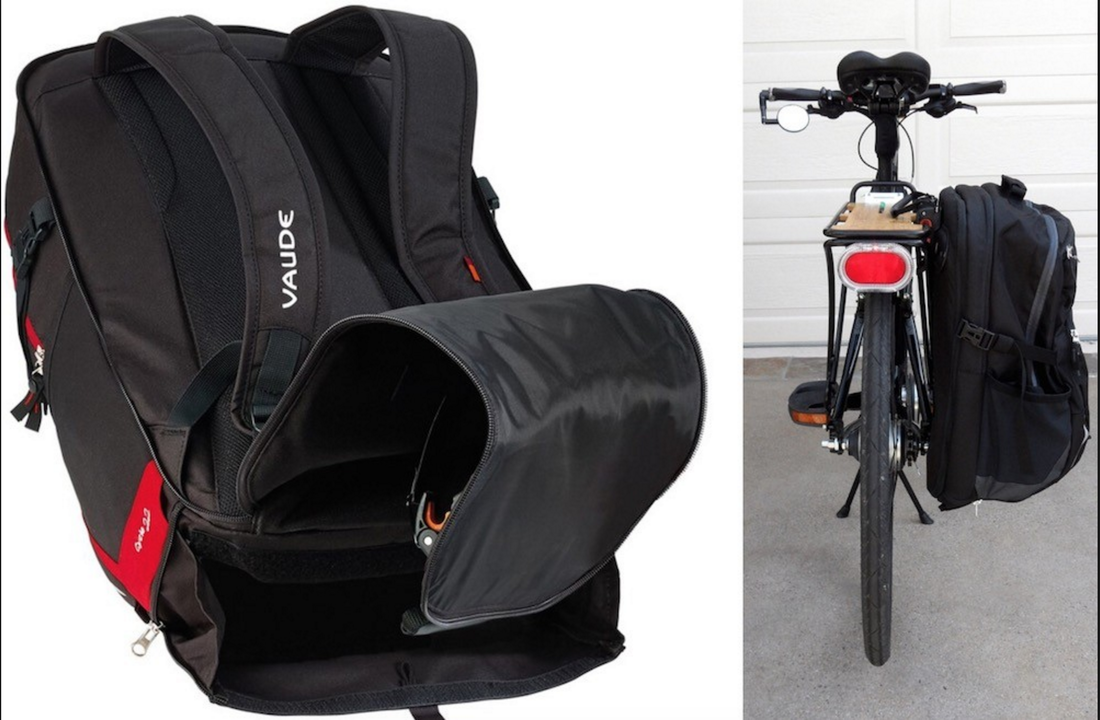
Vaude uses a zip off panel that exposes the backpack straps. They're mounted above the hooks, which makes it feel more like a backpack, and the fabric that is exposed to your rack gets hidden away. I can't vouch for this one since I've never used it, but I wonder how stiff the backpack is when in pannier mode. It seems like there would be a bit of sagging as the bag pulled away from the hooks. I also wonder if the tucking of that flap into the bottom of the bag is pretty seamless or if it's awkward. I see velcro but I don't know if it's to attach to the hook flap or to ​just keep the bottom piece in place since it only has zips on the side. 
Picture
Picture
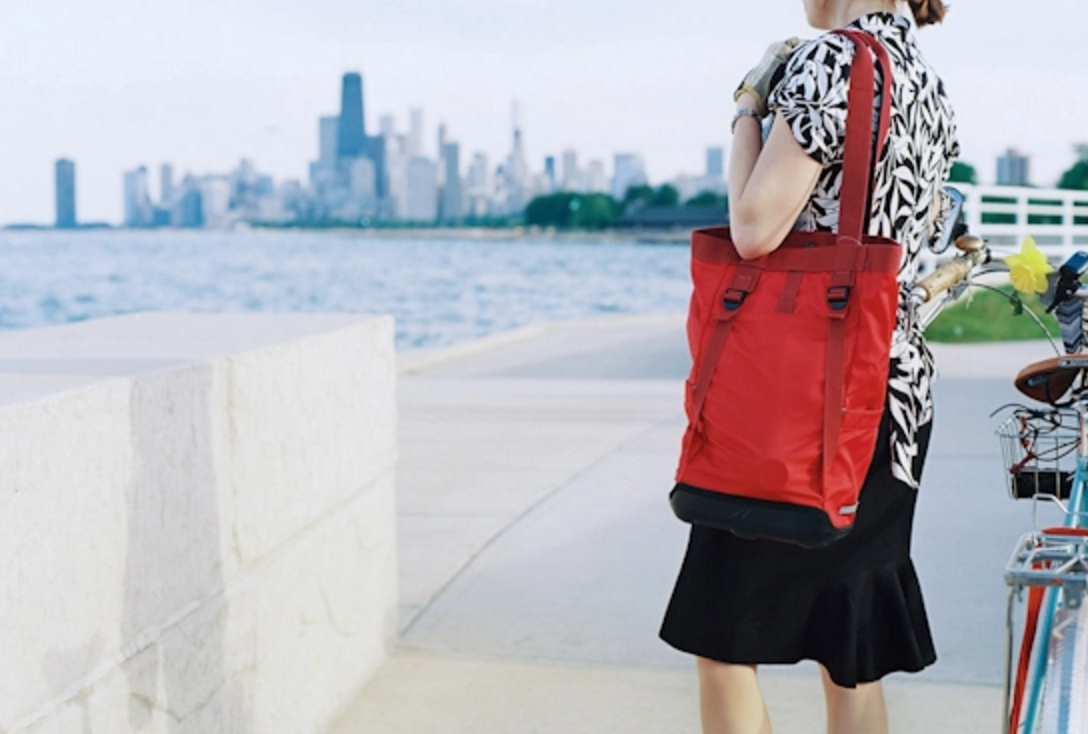
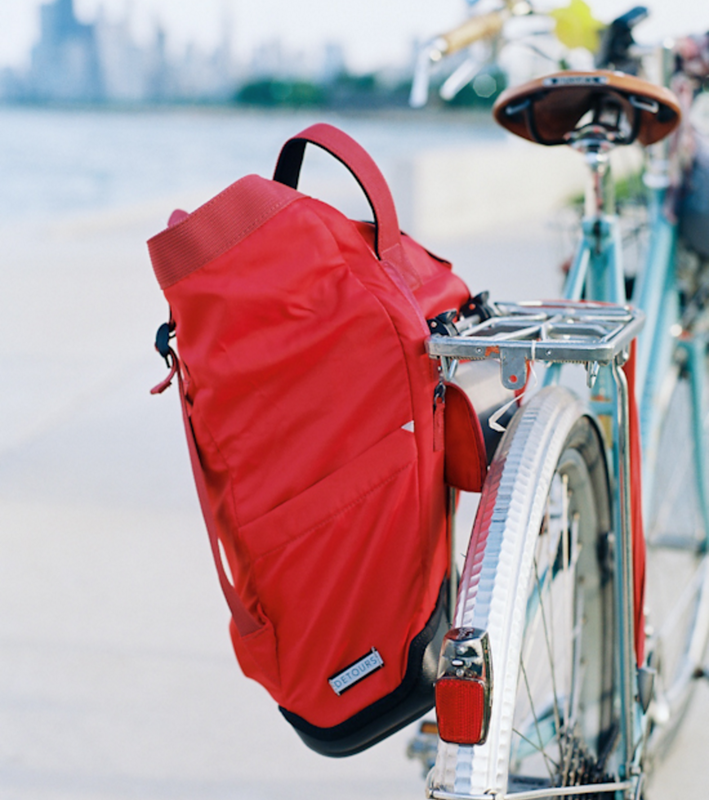
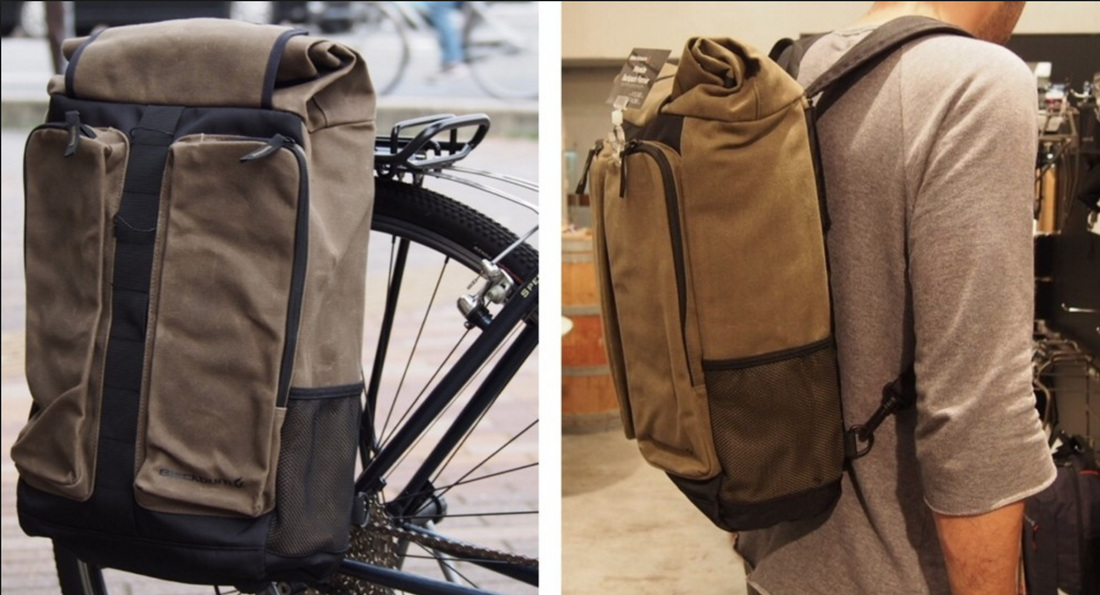
I've not used this model, but I have an older version from Detours that I actually liked quite a bit. The biggest issue with the old model was that it had a rubber bottom with a bit of a corner that dug into your back when wearing as a backpack. This bag has hooks on one side for pannier mode, and shoulder straps on the other when you want a backpack. A few other bags do this, and I think it has its advantages, but limits the pockets and features you can have on the outside. 
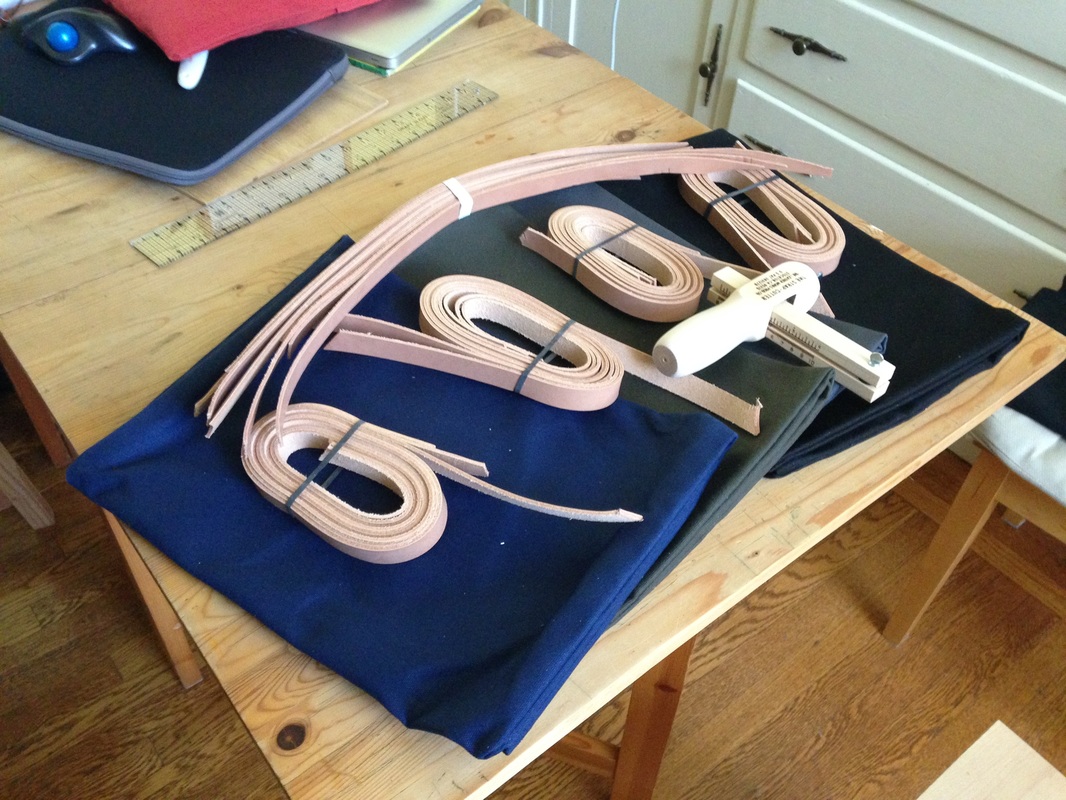
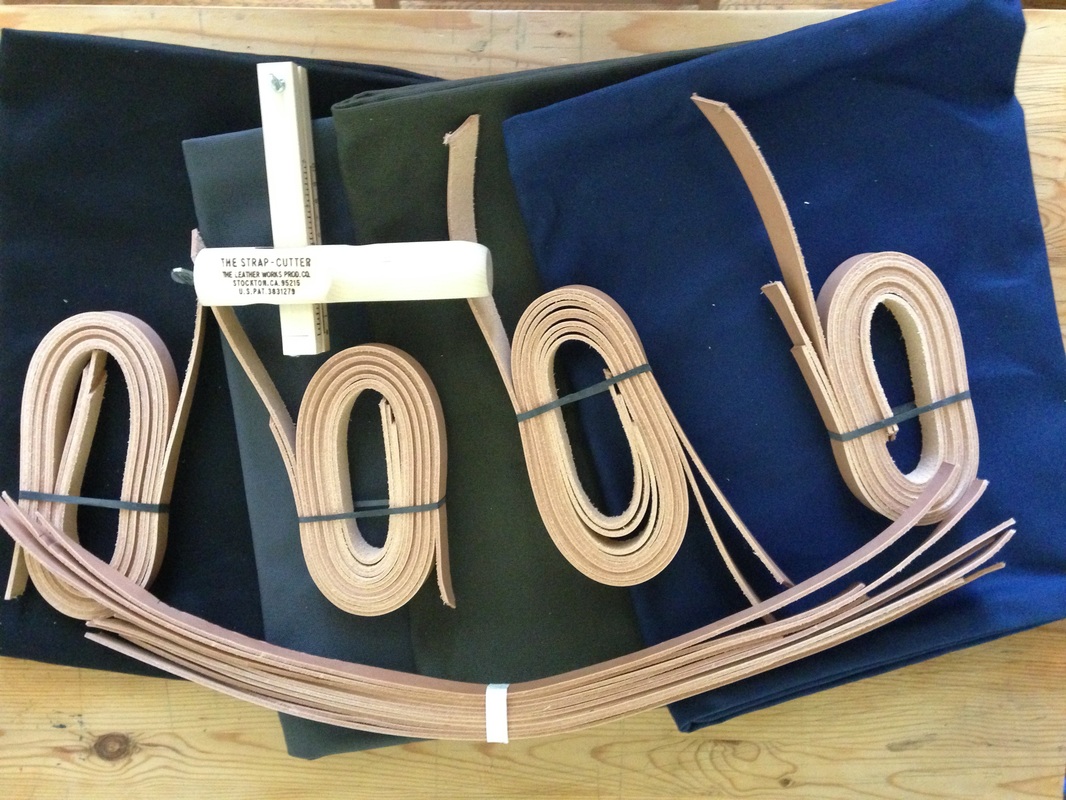
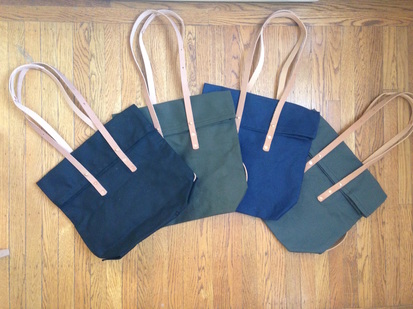
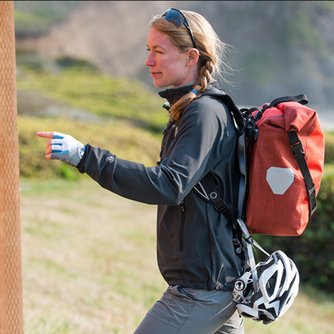
I've been trying various iterations on this pannier backpack, and I think I'm close with this one. I'm limited by materials, and in the future would like to use some high strength stretchy fabric for the front and side pockets. I'll also go back to g-hooks for the bottom of the backpack straps as well. The plastic snap flop around and can get caught in my spokes when I'm pumping up a hill. 
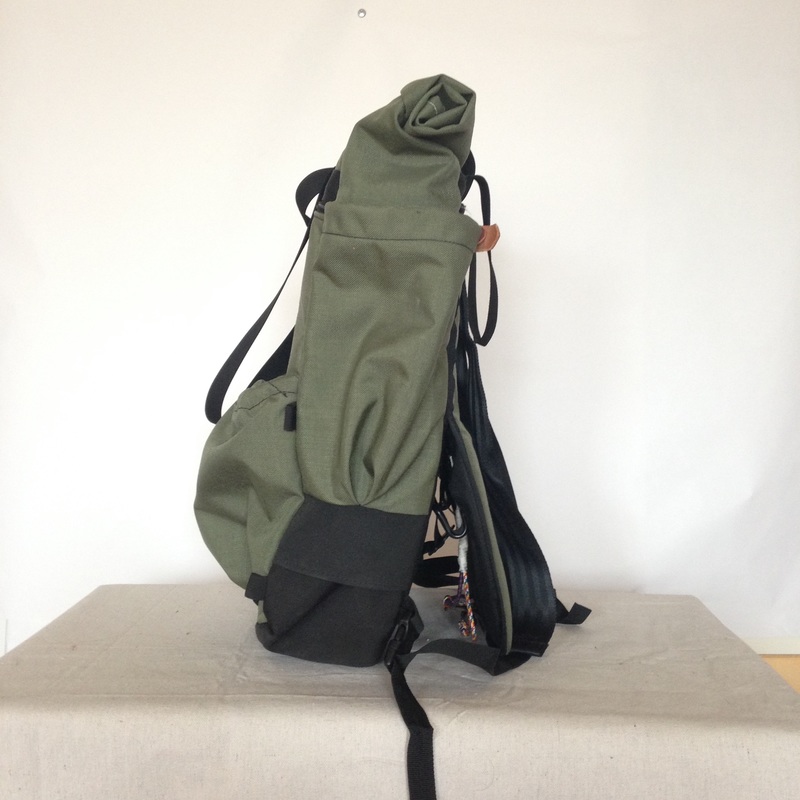
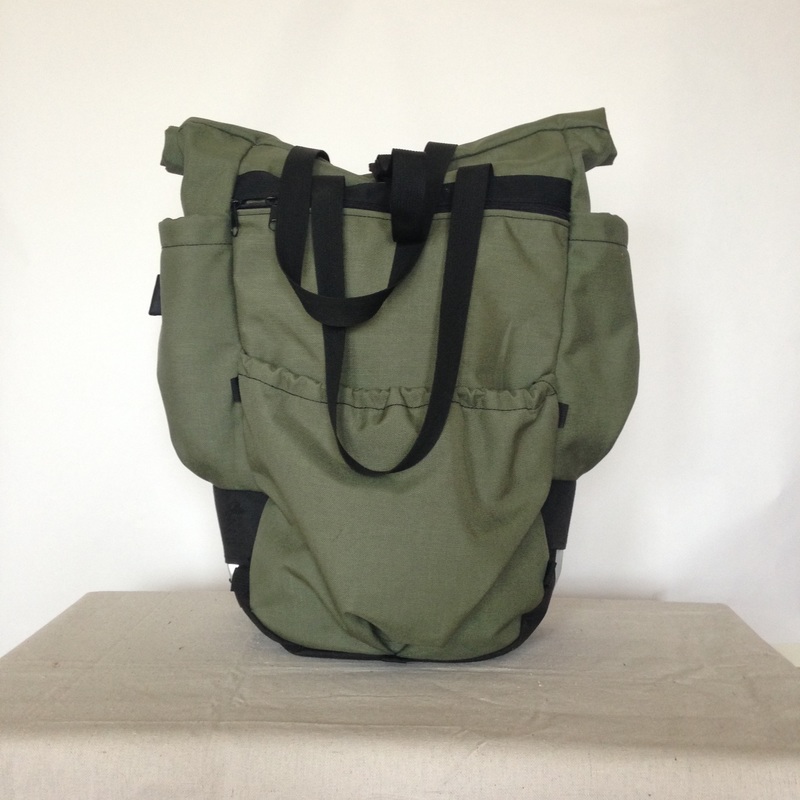
Picture
Pannier front
Picture
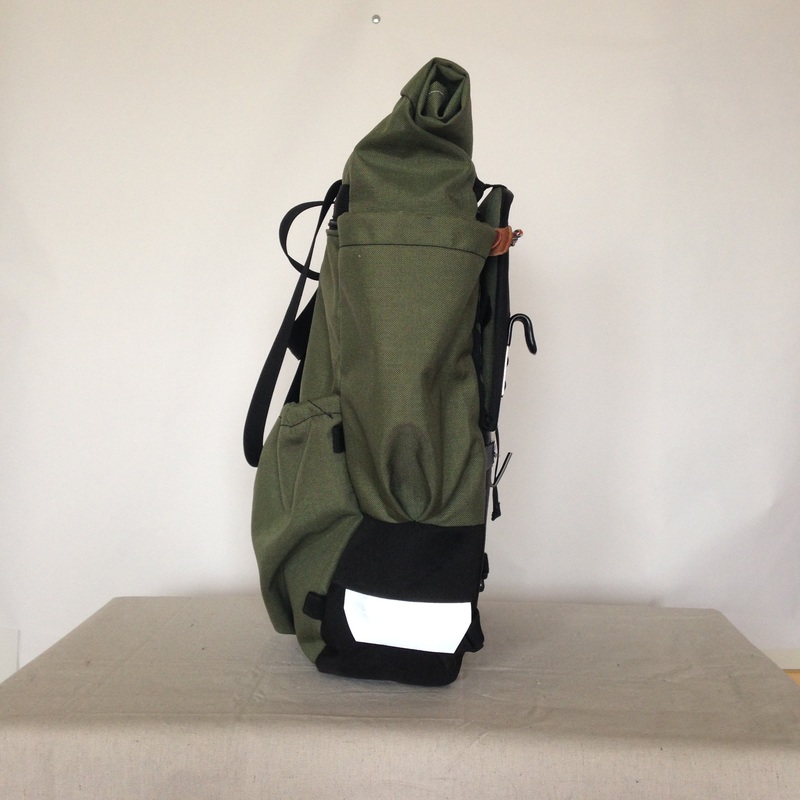
Pannier side with stowaway reflector
Picture
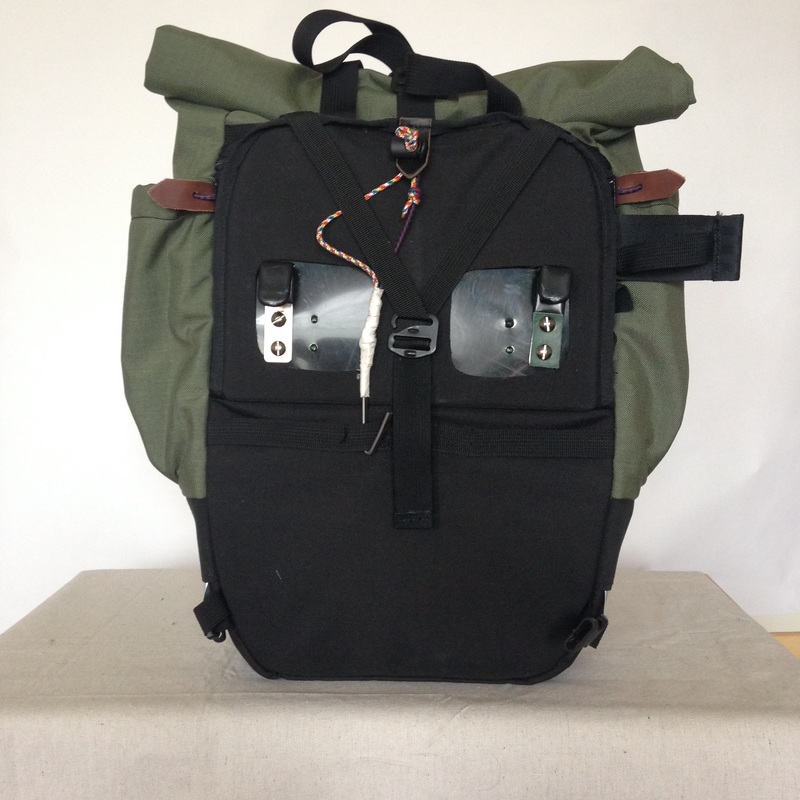
Pannier back. Still trying to figure out the best way to use a bungee type system to keep the pannier held tight. 
Picture
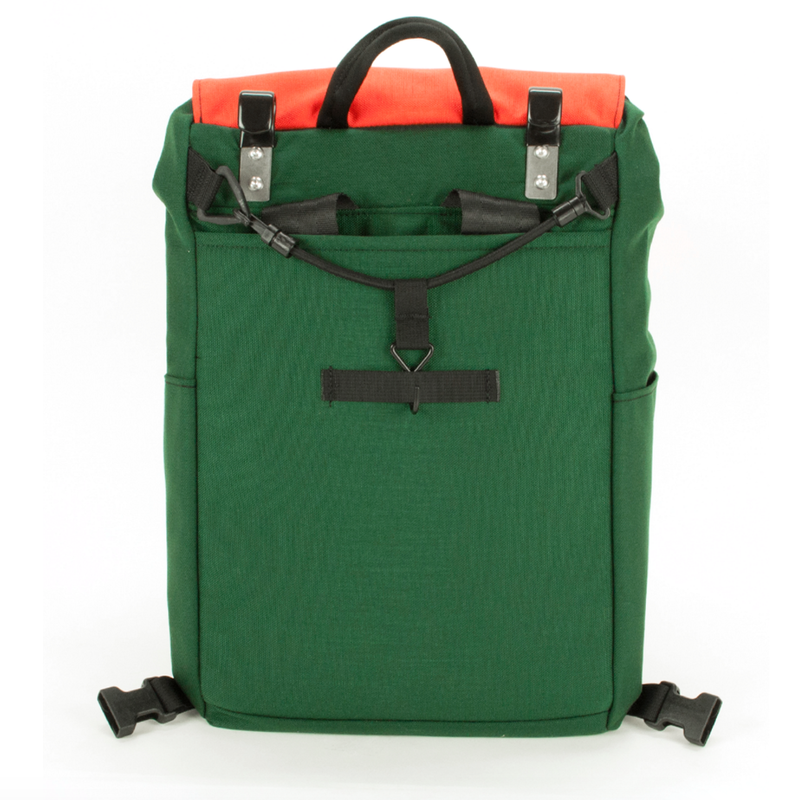
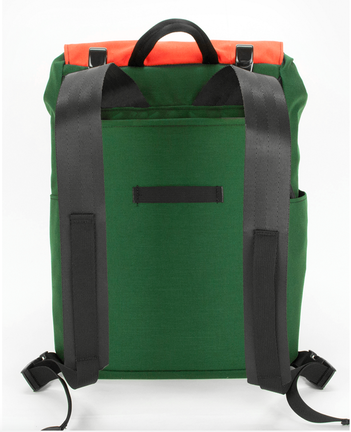
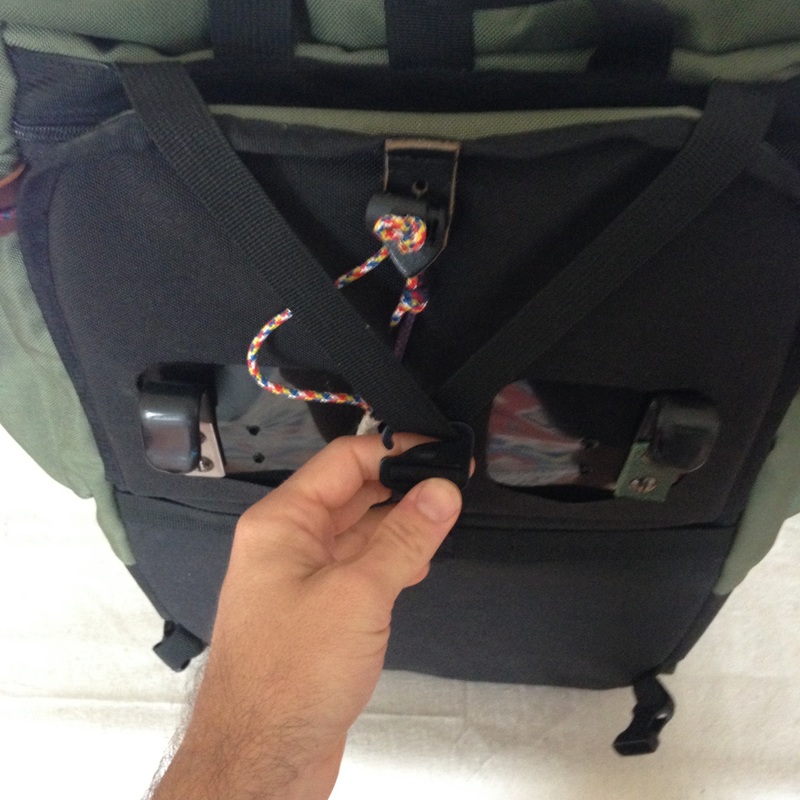
Loosen g-hook to undo flap.
Picture
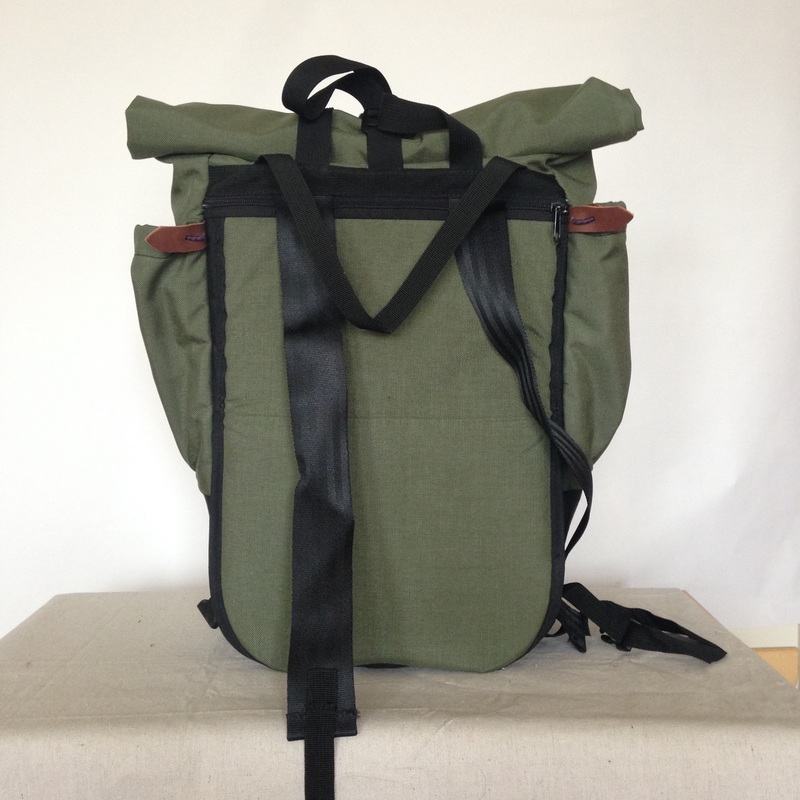
Backpack panel falls down. Entire surface is protected from the elements when in pannier mode. 
Picture
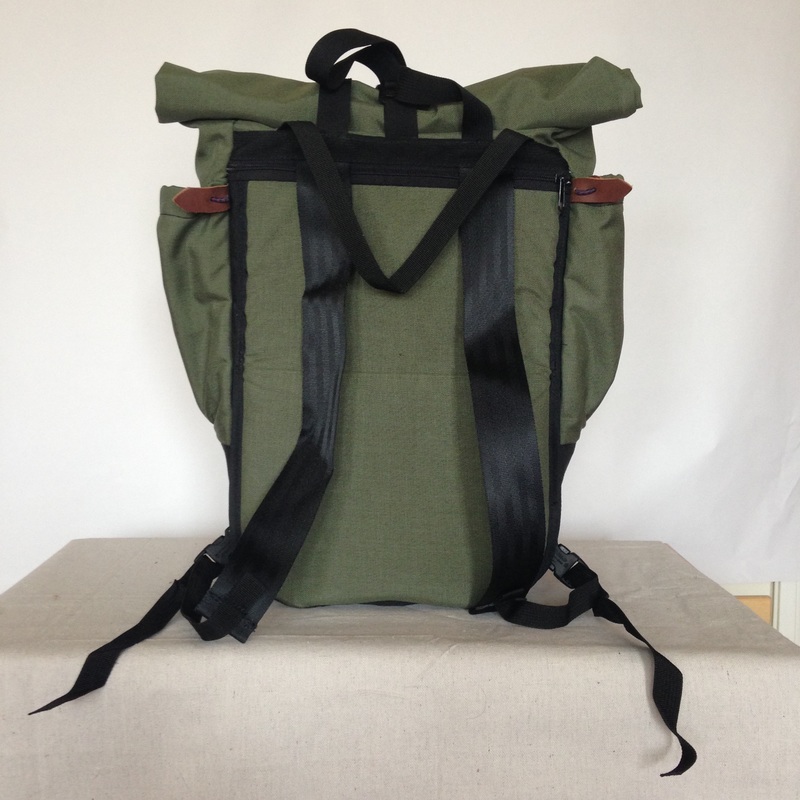
Clip in buckles at bottom and you have a backpack. I'll most likely go back to g-hooks or something similar in the future. 
Picture
Reflector tucks away to look more like a backpack. You may notice the bottom section of the back panel sticking out. In the past I trie to secure this close to the body of the pack, but found there's no need. It presses fairly close to the bag when you're wearing it, and the slight angle actually works out in your favor because it fits into the small of your back. 
Picture
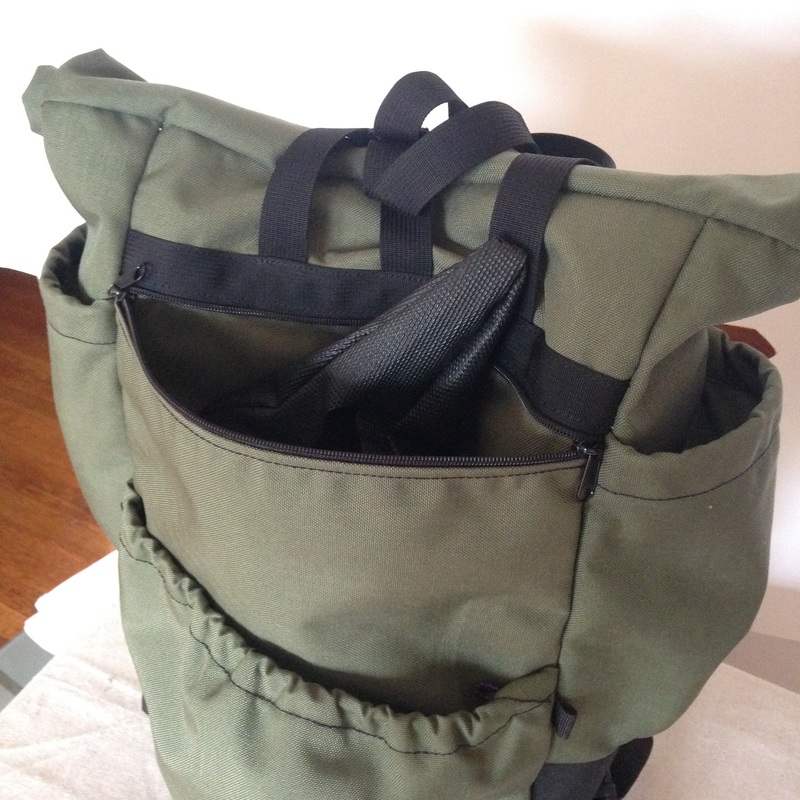
Zippered pocket above the stuff pocket. In the future the stuff pocket will be a stretchy, abrasive resistant material like you find on most hiking packs. 
Picture
Roll-top is secured by g-hook. ​Straps on either side make it handy to carry as a tote if you're popping in and out and don't want to take the 12 seconds to turn it into a backpack
Picture
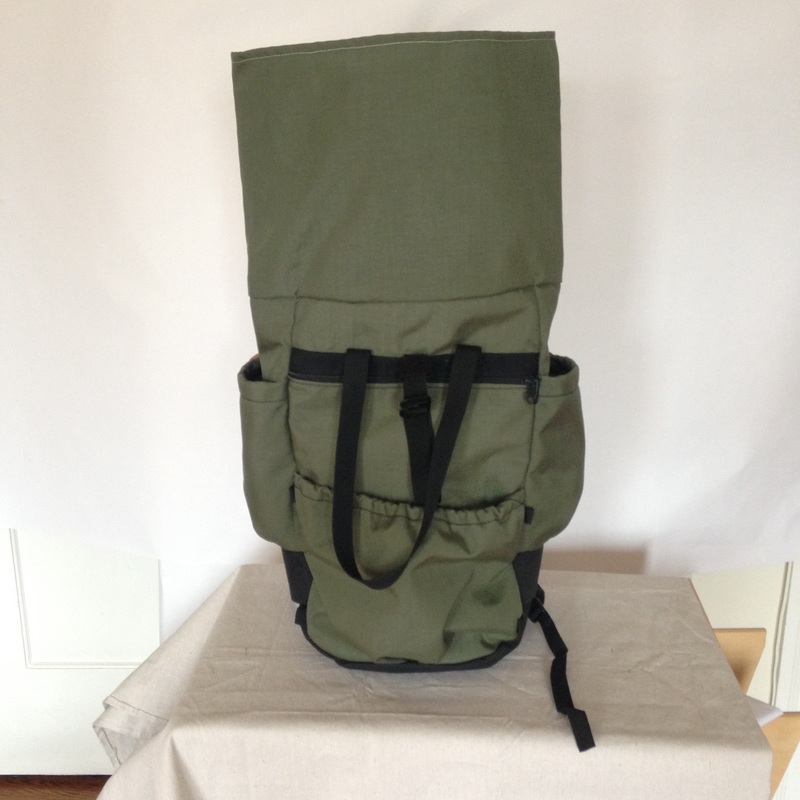
​Lots of room to overstuff and still roll closed. 
Inside is lined with bright orange packcloth. There's also a strip of loop velcro if you want to attach anything inside to keep it handy. 
3 Comments

Messing around with Arduino

9/11/2016

2 Comments

 
Picture
Light sensor 
Picture
DC motor control
Picture
Servo control
For years I've had a few Arduinos and a ton of hardware. Every time I made time to learn it, I always hit a snag or got frustrated with the setup, or not having the right resistors, transistors, sensors ect et al. I've had quite a bit of time these days to learn something new, so I've been taking advantage of Jeremy Blum's Youtube tutorials, as well as his book. 
Picture
Picture
I met Jeremy when I did my residency at Shaper Tools. He's a down to earth guy but mad smart when it comes to electronics. If you're looking to dive into Arduino, I'd start with his tutorials and then grab his book. 

I'm starting off with the basics and slowly adding the items I need when I need them. I just ordered a pretty cheap starter kit that has most things you need for an insanely cheap price. 
Picture
You can buy it on Amazon. Click on image.
I had an issue using my cheap boards with my Mac, but they work fine on my Chromebook using ChromeDuino.
I'm hoping to incorporate an Arduino into my kinetic sculptures. I either want to make them more interactive by tossing in some sensors, or just be able to have more control over my movements without having to get crazy with gearing and cams. I think I'll always prefer mechanical inputs over electrical ones, but I can see where it makes sense. I'm hoping to sketch out something new this week, something flapping no doubt, or maybe more like a machine or rube goldberg machine that can be automatically reset. 
2 Comments

July 11th, 2016

7/11/2016

1 Comment

 
Picture
Picture
I'm using Onshape, and I've been quite a few issues with my assembly mates. I was hoping I could animate everything to give me a feel of how it's going to look. But I can't.

Picture
​I can't figure out how to give the two gears rotation restrictions without interfering with my rack and pinion mate. 
It's easy enough to see the min and max angle of rotation. I can do with for both gears, even though I don't like that I can't just use negative degree to get the same limits for the other gear. 
Picture
Picture
Obviously things start breaking. Hard. And I totally understand why. But then it becomes a bit tricky if you want certain things, like the gears, to start i the correct space related to the rack.
I'm also using a cam to control my rack and pinion. I can fake it with a tangent mate, but after a bit the relationship swaps from outside to outside and jumps to inside to outside. 
Picture
Picture
Even when the tangent mate does hold, I can't fully rotate my cam in a circular motion because it gets hung up around 180 degrees. I'm not really sure what's happening here. 
Picture
1 Comment

Something I started 

7/5/2016

1 Comment

 
 Today I started a month-long residency at Shaper Tools. They're ramping up for a pre-order soon and have a pretty amazing product. I'll be using the Shaper Origin, along with standard tools (table saw, drill press) to make a kinetic sculpture. It's a really cool gig because I get to keep what I make. Basically, they're going to have a catalogue of cool stuff for marketing, but they're also going to make the files available to everyone else that might want to make something similar. 

I made something simple in order to learn the tool. It's machine that makes use of four gears and a ratchet mechanism. 
​
Picture
I only have until the end of July, so I can't spend too long on this project. The goal is to learn how it all works so I can tweak the main design before starting in order to mitigate as many mess-ups as I can. I'm hoping to get done with this shorter project by the end of the day Thursday.

​Today I made some gears at half scale. They don't mesh as nicely as I had hoped, but I think it's due to the sharp edges on the teeth. 
Picture
​I added a small fillet and I think that will do the trick. 
Picture
No fillet
Picture
0.2" fillet
The tool is actually really easy and intuitive to use. The only issue I have is setting up my file before importing. I'm designing everything in 3D CAD, but the Origin only accepts SVG files. That alone wouldn't be a big deal because I can save as a DXF, import to Illustrator, and then save as an SVG. The issue is with the color coding. Shaper uses four colors to differentiate between an inner and outer cut, as well as a fill cut. The issue arises when you have to stack a few different layers on top of each other to get the cut you want.  

For instance, say you want to cut a donut shape out of a sheet of plywood. I'm trying to do just that so I can create a built in "rod" to attach a bearing. 
Picture
The issue is you can't just use one single image/color to get the cut you want. In this case, you have to stack two colors together. Blue lets you cut on the inside of the shape. Green cuts on the outside of the shape. Red is a fill cut, to get rid of material. 
Picture
Cut types, separated
Picture
Cut types, combined
You can probably see the issue. If you don't open up your layers, it's hard to see what all you have in there. But you need both. The red layer cuts out all of the area. It stops before getting to the edge and middle. That is to say, it won't mis-cut, but it also can't go all the way to the edge. I don't fully understand the reasoning behind the software, but I think it only goes 1/2 the width of the cutting bit from the edge. The blue layer is what gives you the precise, to-the-edge cut. 

I'm still getting used to thinking this way. It reminds me a bit of printmaking. You have to think about negative space even though you're putting something (in this case, a red and blue circle) where you want it to be cut. The same in wood and lino cuts. It could also be compared to screen printing since you have to think about all of the layers you're stacking on top of each other.

I know a lot of people won't be creating their files in a 3D CAD program, but I think there needs to be a more intuitive way lay out the cuts you want to make. There was talk of plugins for Autodesk Fusion, and maybe down the down you'll be able to upload a STEP file and it'll flatten it out for you and auto-assign what cuts to make. 
1 Comment

July 05th, 2016

7/5/2016

2 Comments

 
Something I Got
So a few weeks ago I got an email from Klean Kanteen asking me to review their products. I left a poor review on their Cafe Lid. Today, I received the Cafe Cap 2.0. 
Picture
Picture
Picture
Picture
I want to make a proper video review in a few days, but here's a little info about this new lid verses a few others, plus some initial thoughts. ​
Klean Kanteen Cafe Lid 1.0​
Picture
Hydro Flask Hydro Flip Lid
Picture
Picture
Klean Kanteen Cafe Lid 2.0
Something I got6/22/2016
0 Comments

 
So a few weeks ago I got an email from Klean Kanteen asking me to review their products. I left a poor review on their Cafe Lid. Today, I received the Cafe Cap 2.0. 

I want to make a proper video review in a few days, but here's a little info about this new lid verses a few others, plus some initial thoughts. 

Klean Kanteen Cafe Lid 1.0
Hydro Flask Hydro Flip Lid
Klean Kanteen Cafe Lid 2.0
I know Klean Kanteen states that their Cafe Lid (1.0) isn't leak-proof, but still, it's pretty silly. I supposed they designed it like they did because it's easier to clean. But, if my bottle falls over and I immediately pick it up, I don't expect to lose half of my coffee (that's $2.25 worth of coffee in San Francisco!).

That's why I bought the Hydro Flask Flip Lid. Super simple design, maybe even a little boring, but it works. You flip the lid, take a sip, and then flip it back down. Easy peasy. You can turn it upside down, and unless you pop open the flappy lid, you'll only get a few drops of liquid, and that's just from the liquid that collected on the outside of your lid. 

The Cafe Lid 2.0 solves a lot of those problems. But it's big. And heavy. The original Cafe Lid weighs in at 35 grams. The Hydro Flask is a scoatch heavier at 39 grams. And then you have the new Cafe Lid. Look at that monster. It's 63 grams. That's half the weight of your phone! Why's it so heavy?
Picture
Because it's made of five (5!) pieces. I can handle the first four, but that fifth feels like bad design. It's a nut that locks the whole thing in place. I think I know what happened. Originally, the nut was molded into that fourth piece. But, since it's directly touching the silicone valve (the piece in the middle), it would work its way loose after all of the twisting you do to open and close your lid. So, they add a separate nut, which locks to the plastic via a ton of indents, and it stays put until you want to take it apart for cleaning.
Picture
The silicone valve is pretty bulky and heavy, coming in at 15 grams. 
Picture
How it locks.
I'm not sure if you can tell in this picture, but these two indents are tiny ramps that really compress the silicone valve into the lid, covering the hole where the liquid comes out, as well as the tiny hole to let the air in when you drink. Feels like they only needed that valve to cover those two openings and could've figured out a way to save a few cents, not to mention grams. 

Something that's not obvious from the pictures is the direction you twist the spinner to drink. The old Cafe Lid turned clockwise to open and counterclockwise to close. I think this is a natural motion for most people. You start with your hand and arm in a normal position, twist your wrist, and you're good. The newer lid is the opposite - counterclockwise to open, clockwise to close. It's awkward because if you start with the spout facing you, you have to either awkwardly twist your wrist or throw your elbow out to the side. So why the switch? Well, this new silicone valve gets smashed pretty tight when you twist the spinner at the top. So tight, in fact, that if you turned it counterclockwise to close, you would unscrew the lid every time. I'm sure they realized this in an early prototype and had to flip everything around, since it doesn't take as much torque to open. 

This new lid costs $9.95, which is pretty steep for a lid. The nearly doubling in price is due to all of those extra pieces they had to make. Time will tell if it's worth the investment. I'm going to dig up my thermometer and do some temperature tests to see which lid holds heat the best. I'll toss the Wide Loop Cap into the mix. 
2 Comments


7/3/2016

1 Comment

 
Something I Made
I cut and attached the leather to the rest of my bags, which makes for seven color options. 
Picture
Picture
The tool on top is what I use to cut the strips. Super handy to have. It's ok cutting shorter strips with a straight edge and rotary cutter, but this tool makes for short work that's much more accurate. 
Picture
The four I finished today.​
Picture
Seven color options. 
1 Comment


6/30/2016

2 Comments

 
Something I made
Technically I made this last week, but I gave it a library/grocery run test. I'm working on a tote bag that doubles as a backpack for lighter loads. I'm hoping to have them up for sell this week. I'll try and take pictures or video clips to show the process from start to finish. It's a simple design but it's still nice to see how it all comes together. 
2 Comments


6/23/2016

0 Comments

 
I'm pining for a job at Otherlab, and after watching a few of their videos I heard "graph theory" getting tossed around. It also looks like their logo is based on it,  so I thought I'd try and learn a bit about it. The books I got from the library were too dry, but there were a couple of videos that had bits and pieces that we're worth watching. 
0 Comments


6/20/2016

1 Comment


Something I'm excited about

A few weeks back I got an email from Klean Kanteen asking me to review their products that I owned. "Doesn't matter if the review is good or bad," they said. So I bashed their lids because they're not that great, especially the cafe lid. Turns out they've been working on a better design and they're sending me a freebie. Try and overlook the fact that I said "seeded" instead of "seated."
Picture
Picture
1 Comment

​